


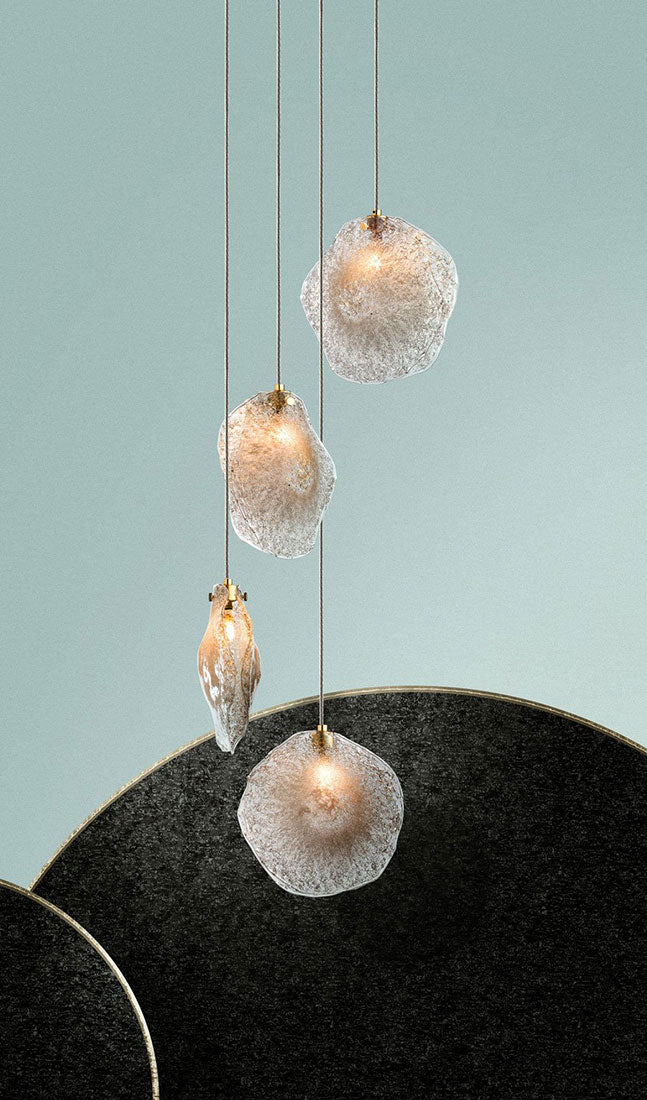


For interior designers, architects, and design professionals, the lighting schedule is one of the most critical documents in a project package. While standard off-the-shelf fixtures can fill basic functional needs, custom-designed, hand-blown glass lighting elevates a space into a highly personalized architectural statement.
However, translating a client’s creative vision into a technically sound, code-compliant, and beautifully scaled custom fixture requires precision. Specifying custom lighting is a multi-step journey that demands a balance of aesthetic curation, spatial mathematics, and detailed coordination with contractors and electricians.
This comprehensive guide walks design professionals through the process of specifying custom lighting for clients, detailing the exact spatial, material, electrical, and structural parameters required to execute a flawless installation.

1. Defining the Design Intent and Lighting Layers
Before diving into drawings or glass samples, you must establish the primary purpose of the custom fixture. Architectural lighting relies on three distinct layers, and your custom piece will often need to fulfill more than one:
-
Ambient Lighting: Providing the foundational glow for a room. Handcrafted glass is uniquely suited for ambient light, as its natural variations softly diffuse light waves and minimize glare.
-
Task Lighting: Delivering focused, direct illumination to functional zones like prep counters, dining tables, or desks.
-
Accent/Sculptural Lighting: Serving as a prominent visual focal point. A large-scale, multi-pendant custom glass chandelier acts as suspended sculpture, establishing the design identity of the entire room.
2. Spatial Mapping: The Mathematics of Scale
A common pitfall in high-end design is misjudging the scale of a custom fixture. A piece that looks perfectly proportioned on a small computer monitor can easily read as dwarfed or overwhelmingly massive once installed. To ensure visual harmony, designers must perform precise spatial calculations.
Determining Fixture Diameter (The Room Dimension Rule)
To calculate a balanced diameter for a central ceiling fixture, use this industry-standard formula:
-
Measure the room's length and width in feet.
-
Add those two numbers together.
-
Convert that sum directly into inches. This value represents the ideal diameter of your custom fixture.
$$\text{Ideal Diameter (inches)} = \text{Room Length (feet)} + \text{Room Width (feet)}$$
For example, if your client’s dining room is 14 feet by 18 feet, the sum is 32. Therefore, a custom chandelier should have a diameter of approximately 32 inches to feel balanced within the volume of the space.
Proportions for Dining Tables and Kitchen Islands
When hanging custom pendant lights or chandeliers over furniture, the scale must relate directly to the surface below:
-
Dining Tables: The fixture's diameter should be between one-half and two-thirds of the total width of the dining table to prevent guests from bumping into it.
-
Kitchen Islands: Pendants should sit at least 6 to 12 inches inward from the outer edges of the island countertop to keep the layout from looking crowded.
3. Selecting the Material Palette and Glass Textures
Custom glass blowing offers an endless array of visual textures, shapes, and color options. When specifying glass finishes for your client, it is crucial to consider how the material behaves under both daylight and artificial light.
The National Endowment for the Arts (NEA) highlights that handcrafted materials introduce an organic, human touch to built environments, offering unique light-refraction qualities that industrial automation cannot duplicate.
|
Glass Finish |
Visual Behavior |
Best Applied In |
|
Clear Glass |
Delivers maximum light transmission and crisp, sharp reflections. |
Modern, minimalist spaces requiring clean, bright illumination. |
|
Seeded Glass |
Features thousands of tiny trapped air bubbles that scatter light, creating a soft, sparkling texture and reducing bulb glare. |
Transitional or coastal interiors; excellent for creating soft ambient layers. |
|
Frosted/Opal Glass |
Heavily diffuses light rays, emitting a warm, uniform, and glare-free glow. |
Bedrooms, bathrooms, and dining areas where cozy comfort is paramount. |
|
Drizzled/Textured Glass |
Displays organic, fluid patterns of glass layered over glass, casting intricate, painterly shadows across nearby walls. |
Entryways, stairwells, and main dining rooms where the fixture serves as primary artwork. |

4. Drafting the Technical Specification Sheet
An interior design specification requires far more than a simple product name and image. To ensure the design is executed without delays, your technical specification package should include the following parameters:
Electrical and Lighting Output Specifications
-
Lamping Type: Specify whether the fixture uses integrated, low-voltage LED arrays or traditional, replaceable medium-base (E26) bulbs.
-
Color Temperature: For high-end residential interiors, specify warm-white light sources of 2700K to 3000K. This color range brings out the natural beauty of wood, stone, and fabrics.
-
Color Rendering Index (CRI): Always specify a CRI of 90 or higher. This guarantees that your client's carefully selected paints, textiles, and finishes appear in their truest, most vibrant colors.
-
Dimming Protocol: Coordinate with the project's electrical engineer to specify compatible dimming drivers (such as Triac, ELV, or 0-10V systems). This is essential for preventing irritating LED hum or flicker.
Structural and Mechanical Specifications
-
Overall Drop (OAD): Measure and record the exact distance from the ceiling canopy to the very bottom of the lowest glass element. For high-ceiling areas like entryways or stairwells, verify whether the fixture requires an adjustable, field-cuttable cable system.
-
Fixture Weight: Document the total physical weight of the completed fixture. High-end custom glass installations can be incredibly heavy, often weighing upwards of 100 pounds.
-
Ceiling Type Compatibility: Note whether the ceiling is flat, sloped, vaulted, or coffered. Sloped ceilings require specialized swivels, adjustable cable locks, or customized canopies to ensure the glass hangs perfectly plumb.
5. Navigating Structural Support and Code Compliance
When specifying a heavy, custom-engineered lighting installation, safety and structural integrity are paramount. You must coordinate with your project’s general contractor and electrician during the framing phase of construction.
Ceiling Box Weight Ratings
Under the National Electrical Code (NEC) Section 314.27, standard outlet boxes are only rated to support fixtures up to 50 pounds unless they are specifically marked and listed for heavier loads.
If your custom chandelier exceeds 50 pounds, the specification sheet must instruct the contractor to install independent structural wood blocking (such as $2\times6$ framing) directly above the drywall to securely anchor the canopy screws.
Environmental Safety Ratings
Make sure to specify the correct environmental rating for the fixture's location:
-
Dry Location: Suitable for standard living rooms, dining rooms, and high entryways.
-
Damp Location: Required for covered patios, outdoor spaces protected from direct rain, and bathrooms where condensation regularly accumulates.
-
Wet Location: Mandatory for fixtures that will come into direct contact with dripping, splashing, or flowing water.
Step-by-Step Specification Workflow
For a smooth, stress-free custom commission, follow this sequential design and engineering workflow:
1. Determine the Spatial Footprint: Phase 1.
Analyze the architectural plans, ceiling heights, and furniture layouts to calculate the ideal scale, shape, and overall drop of the custom fixture.
2. Select Glass Styles and Finishes: Phase 2.
Present custom glass samples, colors, and metal canopy finishes to your client in the space's actual lighting conditions to ensure a perfect design match.
3. Request Engineering Drawings: Phase 3.
Collaborate with the custom lighting manufacturer to generate detailed CAD layouts, canopy drilling plans, and wire drop diagrams.
4. Review Electrical and Dimming Compatibility: Phase 4.
Confirm that the fixture's voltage, driver types, and dimming systems align with the home's smart automation or wall switch controls.
5. Coordinate Structural Prep on Site: Phase 5.
Provide the general contractor with the fixture's final weight and canopy dimensions so they can install the necessary structural wood ceiling blocking before drywall is completed.
Designer's Note: When presenting custom lighting to your clients, explain the nature of hand-blown glass. Minor variations in glass thickness, subtle bubbles, and organic shapes are not flaws. They are the hallmark of true craftsmanship, ensuring that your client's finished light fixture is a completely unique, one-of-a-kind original.