


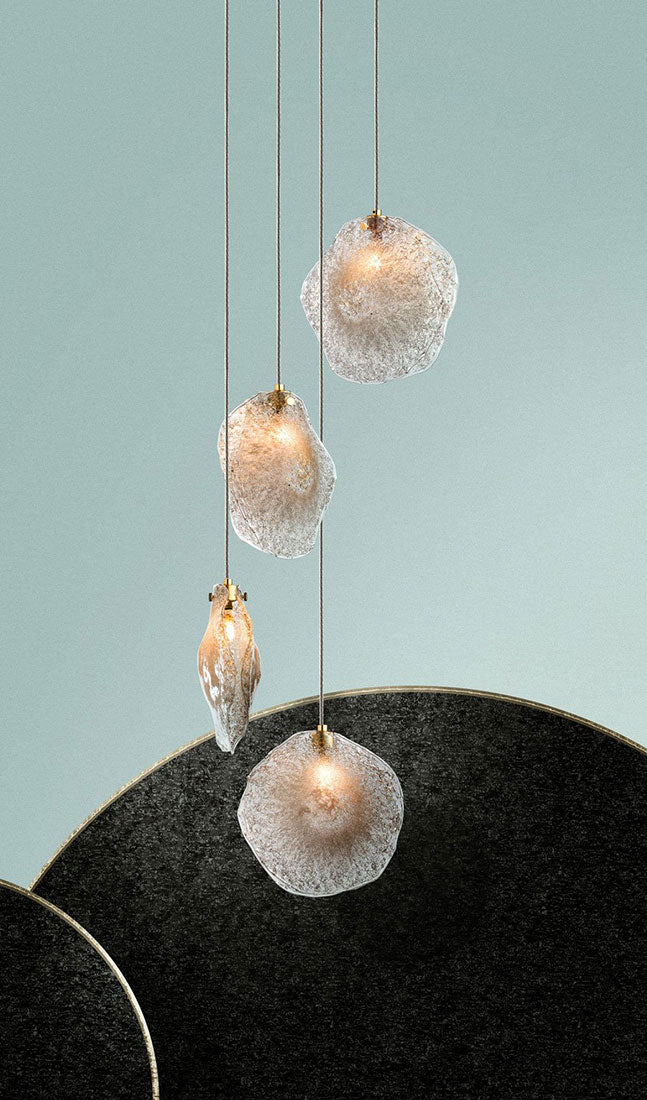


A spiral staircase is more than just a way to get from one floor to another; it is a major design statement. Whether it is a minimalist steel structure in a modern loft or a grand, sweeping stone staircase in a luxury estate, its curves naturally draw the eye upward. This unique shape makes the center of a spiral staircase the absolute perfect spot for a dramatic, cascading lighting fixture.
However, lighting this kind of space is notoriously tricky. Because a spiral staircase winds tightly around a central axis, you look at the light fixture from multiple different heights and angles as you walk up and down. If the lighting is not planned carefully, you end up with a major design flaw: blinding reflection glare. This harsh glare bounces off nearby glass windows, polished hardwood steps, or smooth metal railings, making the stairs uncomfortable, and sometimes even dangerous, to use.
Designing an installation that highlights the beautiful architecture of your stairs without hurting your eyes requires a careful mix of strategic positioning, thoughtful material selection, and smart engineering. Here is a practical look at how to light a spiral staircase without reflection glare.
Why Spiral Staircases Are a Lighting Challenge
Most standard rooms are viewed from a single, predictable eye level. You walk into a dining room or a kitchen, and your eyes stay roughly five to six feet off the ground. Because of this, standard light fixtures only need to shield the bulb from a single horizontal viewpoint.

Spiral architecture demands lighting that looks immaculate and remains glare-free from every step of the journey.
A spiral staircase throws those normal rules out the window. As you move along the steps, your perspective changes constantly:
- Looking Down from the Landing: You see the top of the fixture, the canopy mechanism, and the exposed internal parts of the upper pendants.
- Walking the Mid-Point: You are directly level with the light sources, looking at them from just inches away as you turn.
- Looking Up from the Bottom: You see the bottom openings of the glass and the raw intensity of the bulbs.
If your fixture uses cheap, perfectly clear factory glass or exposed, unshielded bulbs, you will deal with a harsh flash of light at every single turn. This issue is made worse by the reflective finishes commonly used on luxury stairs, such as high-gloss wood stains, polished marble, glass balustrades, or metallic handrails.
Strategy 1: Use Handcrafted, Textured Glass Instead of Clear Finishes
The most effective way to eliminate glare is to stop it before it even leaves the light fixture. Smooth, machine-pressed clear glass does nothing to slow down or diffuse light beams. The light passes straight through, hitting reflective surfaces at full force.
Using handcrafted, heavily texturized art glass changes how the light behaves. When light hits an uneven, artisanal surface, it undergoes multi-directional refraction. Instead of shooting out in one intense beam, the light scatters in dozens of different directions at once. This softens the output, creating a warm, comfortable glow while keeping the space bright.
At Shakúff, we design several custom glass textures specifically to solve this problem:
- The Kadur Drizzle Collection: This style features an inner glass core filled with spun glass fibers and tiny air pockets, all encased in a smooth outer sphere. The internal "drizzle" catches the light and softens the bulb's sharp point.
- The Nimbus Collection: Our artisans dimple the surface of these glass orbs by hand over an open flame. This wavy surface distorts the light just enough to prevent harsh reflections on nearby windows or railings.
- The Crystal Shell Collection: Inspired by organic coastal shapes, the thick, wavy edges and fused glass chunks in our Crystal Shell Chandelier Collection offer excellent light diffusion, making them ideal for large vertical spaces.
Strategy 2: The Staggered Cascade Approach
When figuring out how to light a spiral staircase without reflection glare, the physical layout of the fixture matters just as much as the type of glass you use. Hanging a single, massive light bulb right in the center of the stairwell creates a massive hotspot of glare at the midpoint of your walk.
A much better approach is to break the light up into a staggered, multi-pendant cascade. By hanging a series of smaller pendants at different heights throughout the vertical drop, you spread the total light output across the entire space.
This layout means no single point in the stairwell is overwhelmed by light. The eye travels smoothly down the entire curve of the staircase, following the natural flow of the architecture.
Comparing Lighting Options for Spiral Staircases
To see why textured, artisanal lighting works best for high-volume stairwells, let us look at how different materials handle light and glare.
Material Performance Matrix
| Lighting Material Type | Glare Risk Factor | Light Quality & Spread | Impact on Staircase Architecture |
|---|---|---|---|
| Exposed Bulbs / Edison Styles | Extremely High | Harsh, direct light that creates sharp, distracting shadows. | Distracts from the stairs and looks unfinished from above. |
| Clear Factory-Molded Glass | High | Concentrated beams that bounce off every shiny surface. | Looks sterile and accentuates smudges or dust on the glass. |
| Frosted or Matte Industrial Glass | Low | Even, flat light spread, but can look dull or opaque. | Functional, but lacks visual depth and artistic appeal. |
| Hand-Blown Textured Art Glass | Minimal | Rich, shimmering light that brings out textures without glare. | Acts as a stunning custom sculpture from every angle. |
Strategy 3: Precise Placement and Angled Sightlines
To keep reflections at bay, you also need to think about where the fixture hangs in relation to your daily path. The ideal spot for a cascading chandelier is dead center in the "eye" of the spiral. This keeps the glass elements as far away from your face as possible as you walk the steps.

Suspending individual pendants down the central axis maximizes physical clearance and limits glare.
If your staircase features a large window wall, a common feature in luxury homes, the placement needs to be exact. If you hang the fixture too close to the glass, nighttime reflections can turn the window into a giant mirror, completely ruining your view of the outdoors.
By using our adjustable cable suspension hardware, installation teams can adjust the drop length of each individual pendant on-site. This allows you to test the views from the top, middle, and bottom steps, tweaking the position of each piece of glass until the glare is completely gone.
Pro Tip for Designers: When planning a multi-pendant installation for a stairwell, try to keep the lowest pendant at least 7 to 8 feet above the bottom floor. This keeps the pathway completely clear and ensures no one catches a glare hotspot right at eye level as they step off the stairs.
Balancing Electrical Engineering and Soft Light
Getting rid of glare does not mean you have to live with a dark, dim staircase. Safety on stairs requires plenty of clean, clear light so you can easily judge the edge of each step. The trick is choosing high-quality light sources.

High-CRI LED systems combined with textured glass deliver safe, beautiful illumination without casting harsh hot spots.
At Shakúff, we pair our hand-blown glass pendants with high-efficiency, dimmable LED systems that feature a high Color Rendering Index (CRI). A high CRI means the light shows the true colors of your hardwood, stone, or metallic finishes accurately. By connecting the fixture to a high-quality dimmer system, you can easily turn up the brightness for safe cleaning during the day, or dim it down to a warm, low shimmer for a comfortable path light at night.
Bring Bespoke Lighting to Your Architecture
If you are currently working on a residential or commercial project with a tricky stairwell layout, our design team can help you customize a fixture that fits your space perfectly. Explore our full library of shapes, sizes, and layout options:
- Discover our primary design philosophy and view our completed project gallery
- See how a single, stunning piece can handle light by looking at our Pendants Collections.
- Browse our complete selection of custom cascading setups on our Shop.
For deep technical insights on how light bounces off interior surfaces, you can explore the architectural guidelines provided by the Illuminating Engineering Society. To learn more about the craftsmanship and history behind textured, hand-blown art glass, visit the Corning Museum of Glass.
Frequently Asked Questions
Can I adjust the pendant heights if I change my mind after installation?
Yes. Our fixtures come with adjustable wire suspension systems. While it is easiest to set the heights during the initial installation, the cables can be adjusted later to fine-tune the look and eliminate any unexpected glare.
How many pendants do I need for a standard two-story spiral staircase?
It depends on the width of your stairwell, but most two-story spiral staircases look best with a cascading arrangement of 15 to 35 pendants. This provides a full, balanced look without overcrowding the space.
What is the lead time for a custom staircase lighting fixture?
Because each glass pendant is individually hand-blown by our artisans, carefully inspected, and custom-assembled to fit your specific ceiling height, our standard production lead time is 10 to 12 weeks.